So, your girlfriends just boasted about their new locks, and you felt a little bit of envy? Or maybe your hair genetics are not that great, and you need ways to boost your look? If so, the hair extensions topic might have crossed your radar already.
For those who don’t have much experience with extensions, it all might look very complicated, especially the application part. The truth is, it’s not as hard as it might seem! Although there are extensions that require professional installation, there are some that you can do all by yourself. Something is amazing about the DIY process. You brew a cup of coffee, read a few tutorials, and start the journey.
Quick Access
– Easy to Apply Clip in Hair Extensions
– Even Easier Way with Flip in (Wire) Extensions
– Try Some Hair Wigs
Anyhow, the two types of extensions that are the easiest to apply are clip in and flip in.
If you decide on either of those two, the good news is that there is absolutely no need to set up appointments at the salon and spend time there. Once you get a hang of locks, consider switching to a more permanent solution.
Tape-in, micro ring, fusion, and other extension types are a bit harder to put in, and a professional is advised to do it. You could maybe do it yourself, but only if you have a lot of experience! Make sure you know exactly what you’re doing and have all the right tools.

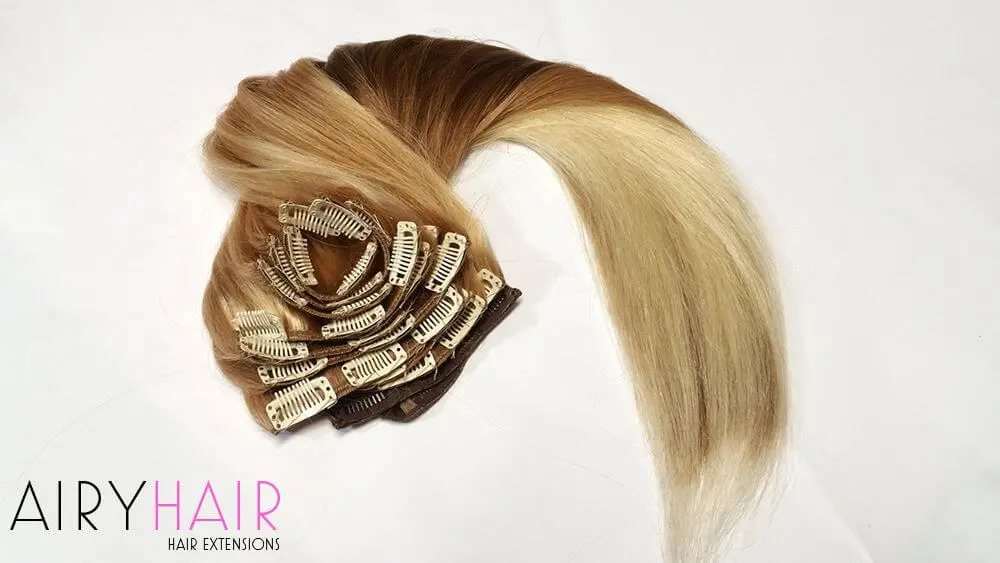
The most popular volume-boosting method. Why? Mostly because these extensions are easy to apply and are not permanent. You can put them in and take them out whenever you want to. That means no glue, tapes, or damage to your hair. Clip-in hair comes in wefts and is attached with clips. So you don’t need any extra tools to put it in.
First Timer Users: Applying Clip-in Hair Extensions
- To get started, section off your hair and clip it up. The horizontal line should go from the middle of one ear to the other. Start with a weft that has three clips. You will usually have two of these in the set. When you press the clips, they snap open and close. They will have a very tight grip on your hair, so you don’t have to worry about it falling out. Take the weft put the clips right into the hairline that you’ve parted, and snap them shut.
- For the next one, you want to go in a little bit higher. This time, take a four-clip weft because you want to follow the natural shape of your head with the wefts. Open up the clips, go into the hair and press them with your fingers to secure them.
- The next weft is going to be the largest one. This one will go from one ear to the next. Part your hair and grab the largest weft. Repeat the same process as before.
- For the last one, pick up the hair at the crown and separate that portion. Place the last three clip weft. Let your hair loose and pat yourself on the back! Maybe grab a low-calorie sweet or two.
Once you get a hang of it, you’ll be able to do this in minutes if you just follow these four simple steps. Taking out the extensions is even easier. Simply press on the clips to open them and remove the hair. You should do this every day before you go to bed because it is not recommended that you sleep with clip-ins.
Ordering
Every type of extension is available on AiryHair website with a month money-back guarantee and hassle-free returns.

Our flip wire hair extensions features a halo or crown-like look which blends in so well with your own hair it becomes pretty much invisible.
A halo-like hair comes in one piece! In other words, there are no wefts or individual strands, and that’s what makes it so easy to apply. You just have to put it on one big weft of hair, and you’re done. Just like clip-ins, they are also not permanent. Be sure to take them off before bed and reapply them whenever you want to.
Applying Flip-in Extensions the Easy Way
- First, you must comb your natural hair thoroughly and take your flip wire extensions out of the box. You should notice a silicone string. That’s the main ingredient behind the magic of halo extensions. It goes on your hair, and there are also two metal crimps on the side to hold the hair.
- You have to size the string to fit your head tightly. Take the hair and put the wire portion about an inch and a half to two inches back from your hairline. You don’t want to go too high up because when you lift your head, it might feel like the extensions are falling off the back of your head, but you also don’t want it to be too close to your hairline because it will not camouflage properly.
- After you’ve placed your hair like a halo, make sure both ends are symmetrical above your ears, and the back should be resting above the nape of your neck.
- Now take a brush for parting hair. Simply take out all the hair that is further back than the wire and pull it out. Make sure that the rest of your hair stays under. After you’re done, style your hair and blend it in nicely with the extensions. That’s it. Call it a day!
When you want to remove your flip-ins, simply find the string and pull the hair off. It is as simple as that. You don’t even have to worry about the clips, glue, or tape. Most importantly, no damage to your hair. Make sure to properly store your hair when you’re not wearing it and maintain it regularly.
It’s important to remind everyone that one must not sleep with any of the short-term extensions. Tresses will not last you for more than a month if you wear them in a way that is other than a few hours.
If extensions are not for you, you can also try out different wigs or fringes. There are full and partial ones, and they are simple to put on. You don’t have to apply individual wefts because there’s only one piece of hair.
Conclusion
If you want extensions that are easy to apply at home and don’t involve any complicated processes, then clip-ins and flip-ins are the perfect methods, along with wigs. It’s great for beginners without much experience.
The results do look amazing! It’s incredible what you can achieve in only a couple of minutes and without going to a salon.


How do you find the right color that you need? My hair is white. I am a very young at heart 70 year old hippy that wants my hair down to my waist. It won’t grow longer then a little past my shoulders.