Let’s cut straight to the chase!
Quick Access
- 2 Minutes – How to Do a Tucked Bun
- 3 Minutes – How to Do a Braided Bun Hairstyle
- 3 Minutes – How to Do a Chain Braid
- 5 Minutes – How to Do a Half-Up Hair Bow
- 7 Minutes – How to Do a Romantic Chignon Hairstyle
- 8 Minutes – How to Do a Boho Braid Twist
- 9 Minutes How to Do a Fishtail Braid
- 10 Minutes How to Do a Rope Twist
- 12 Minutes How to Do Upswept Head Crown
- 25 Minutes – How to Do a Headband Braid
- 25 Minutes – How to Do One Sided Curls
- Bonus: Have 1 Hour? Do a Butterfly Braid
- Bonus #2: Have 2 Hours? Try Hair Rollers
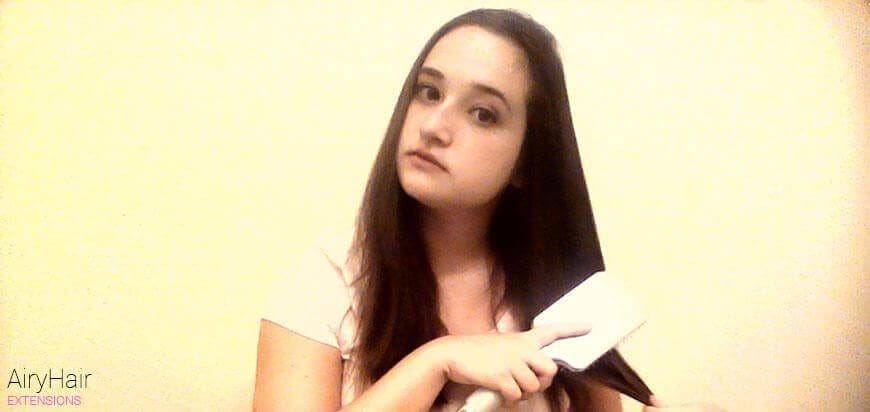
This hairstyle is so quick and easy to do. If you’re having a bad hair day, running late, or not washing your hair the night before; this style is your answer! This sleek look is very classy and easy to complete. All it takes is five easy steps.
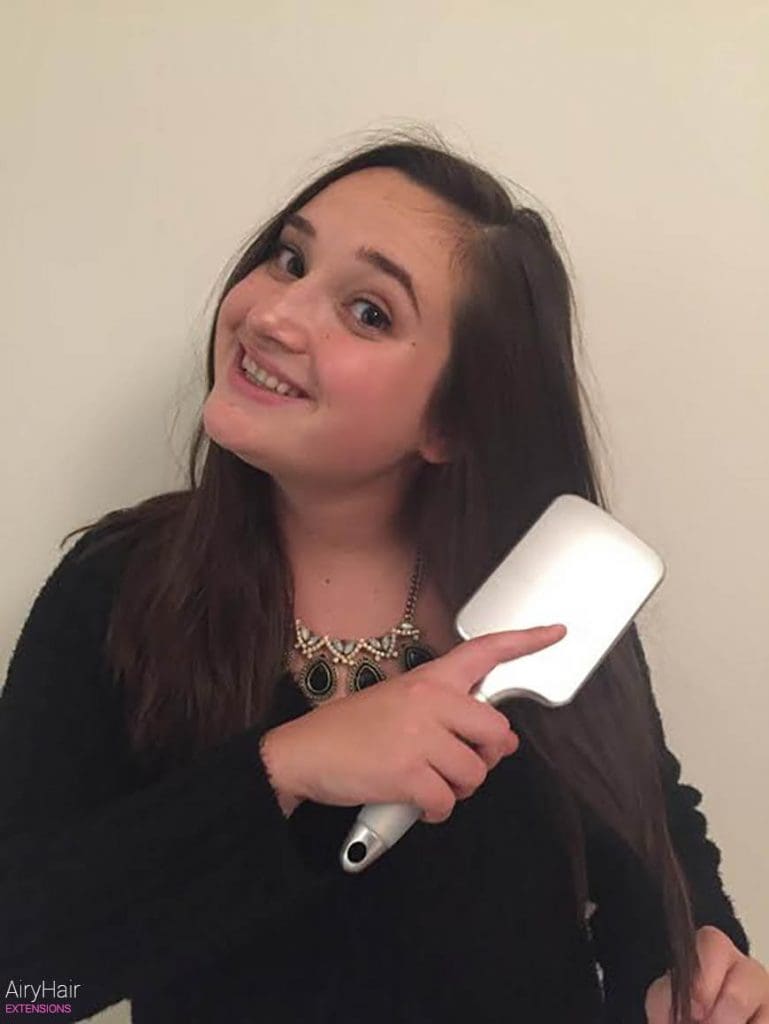
What You Will Need: Hairbrush and 1 Large Hair Tie

How Long Will This Look Take: 2 minutes
Skill Level: Beginner
Video
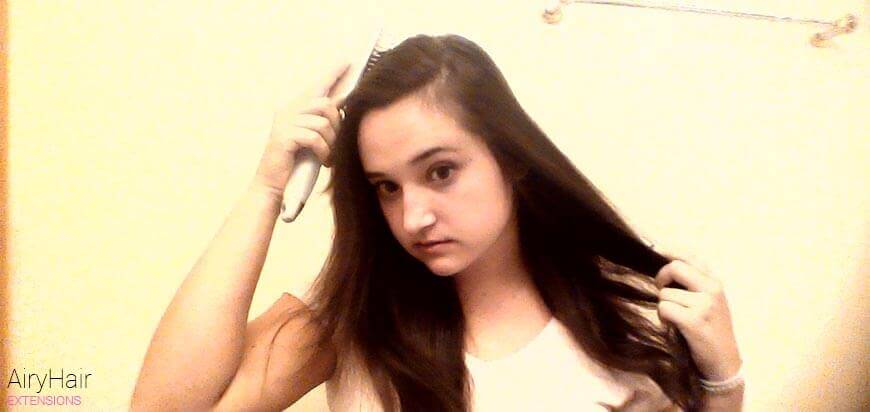
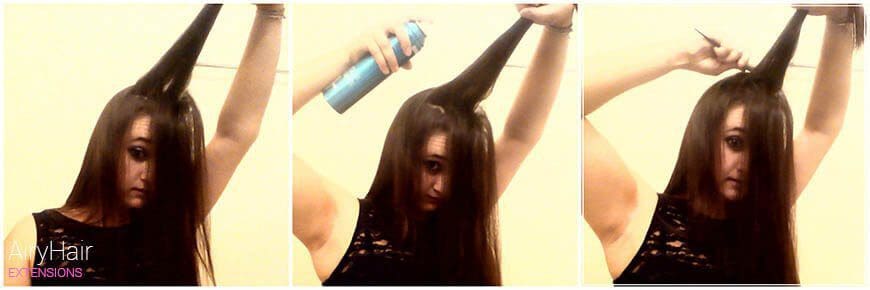
Step One
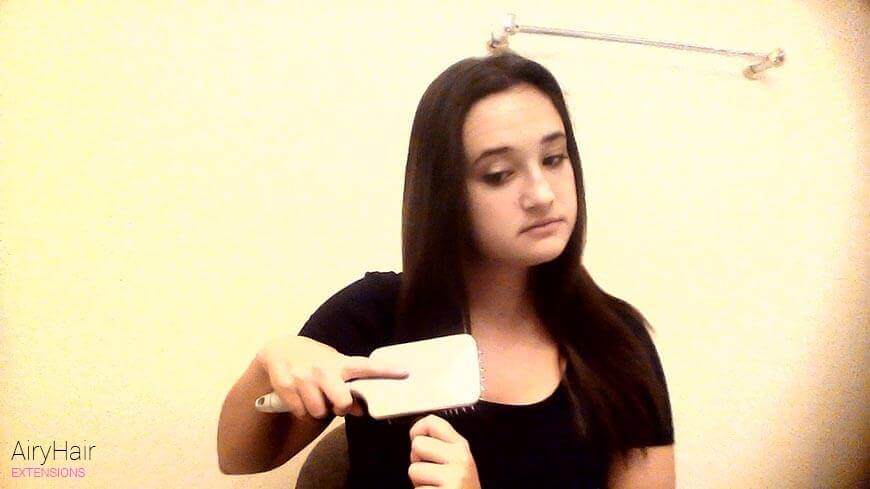
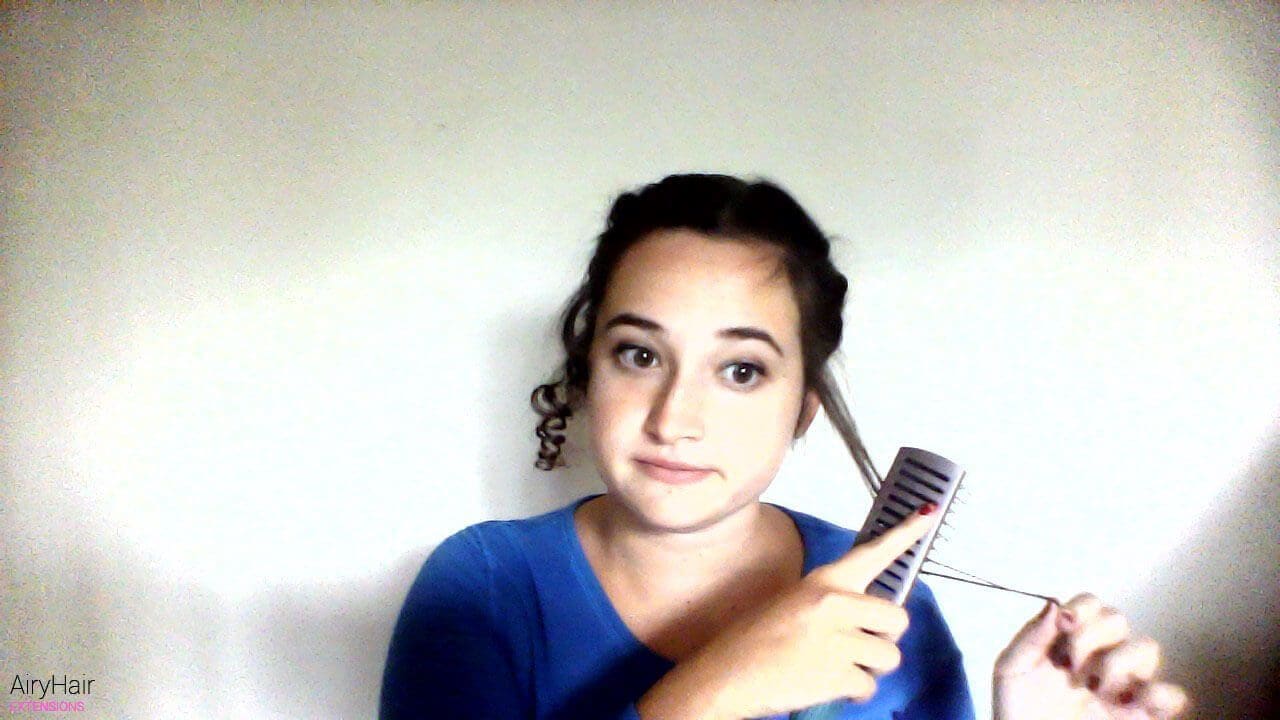
Brush your hair!

Step Two
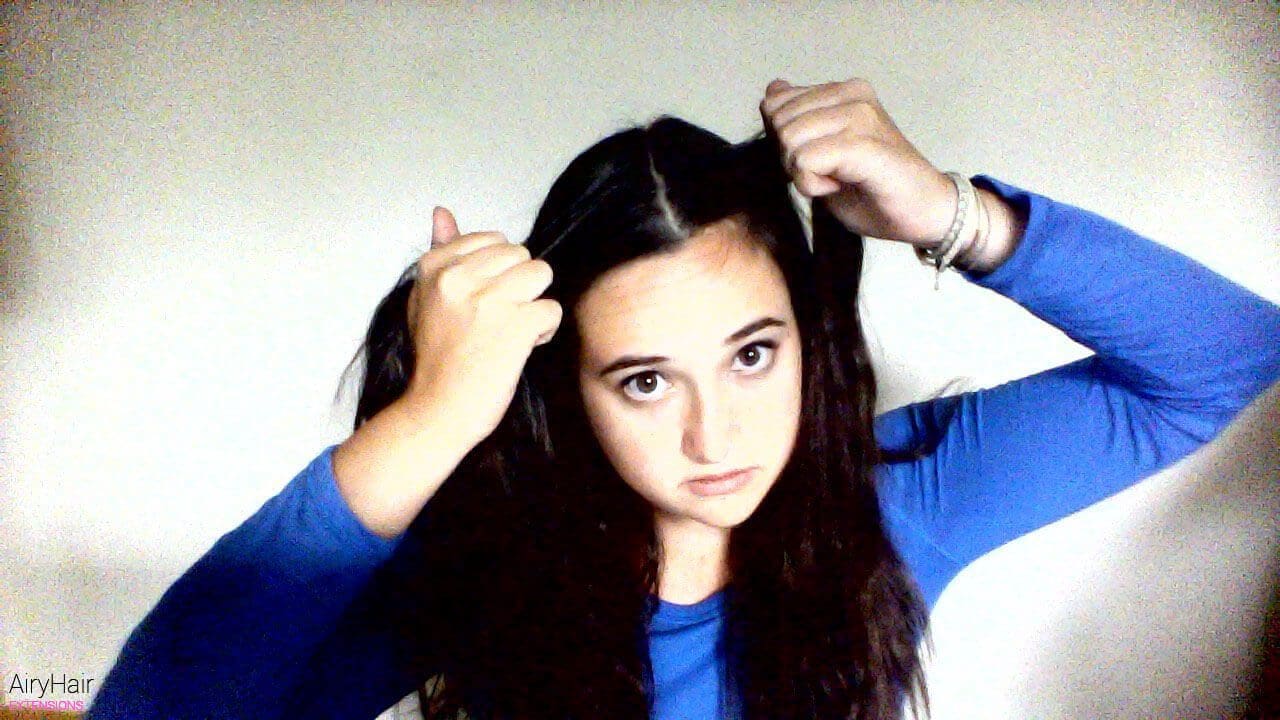
Part your hair far to the side.

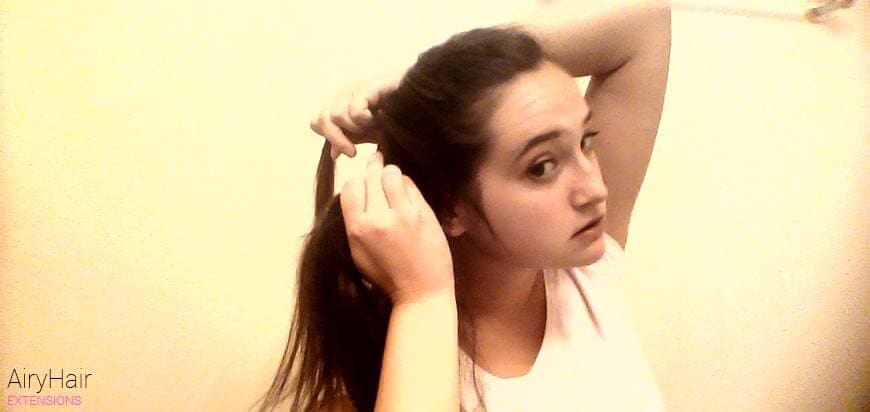
Step Three
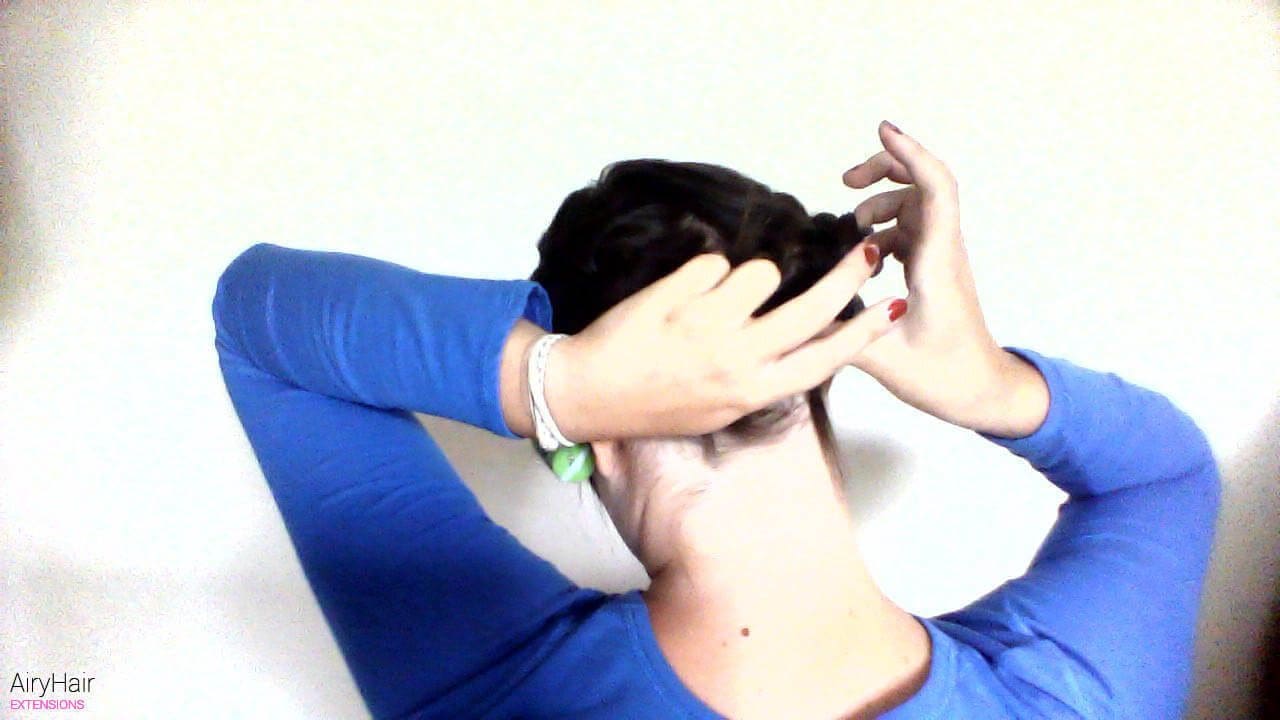
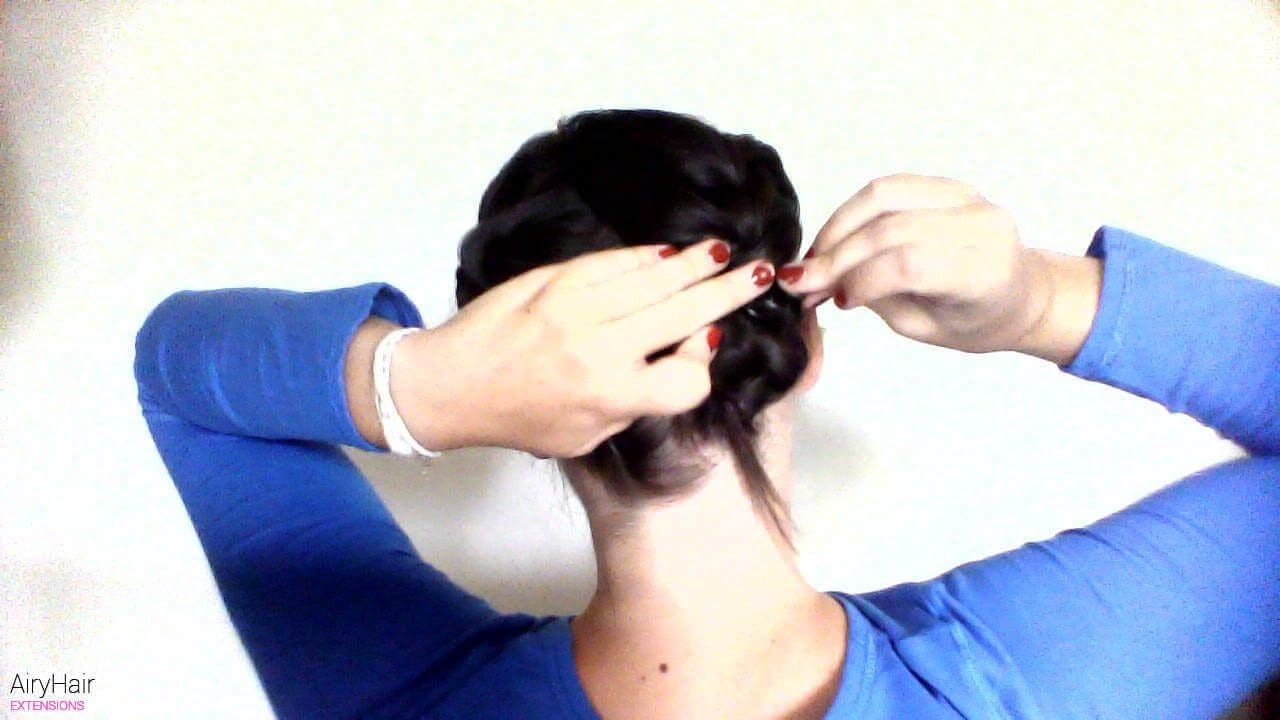
Gather your hair in the middle of the back of your head, then put it into a looped bun.

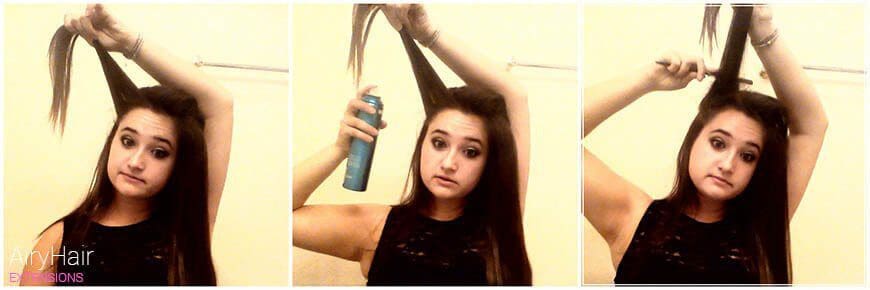
Step Four
Directly above your bun, dig your fingers into your hair and create a hole.

Step Five
Take the bun into the hole you just created.

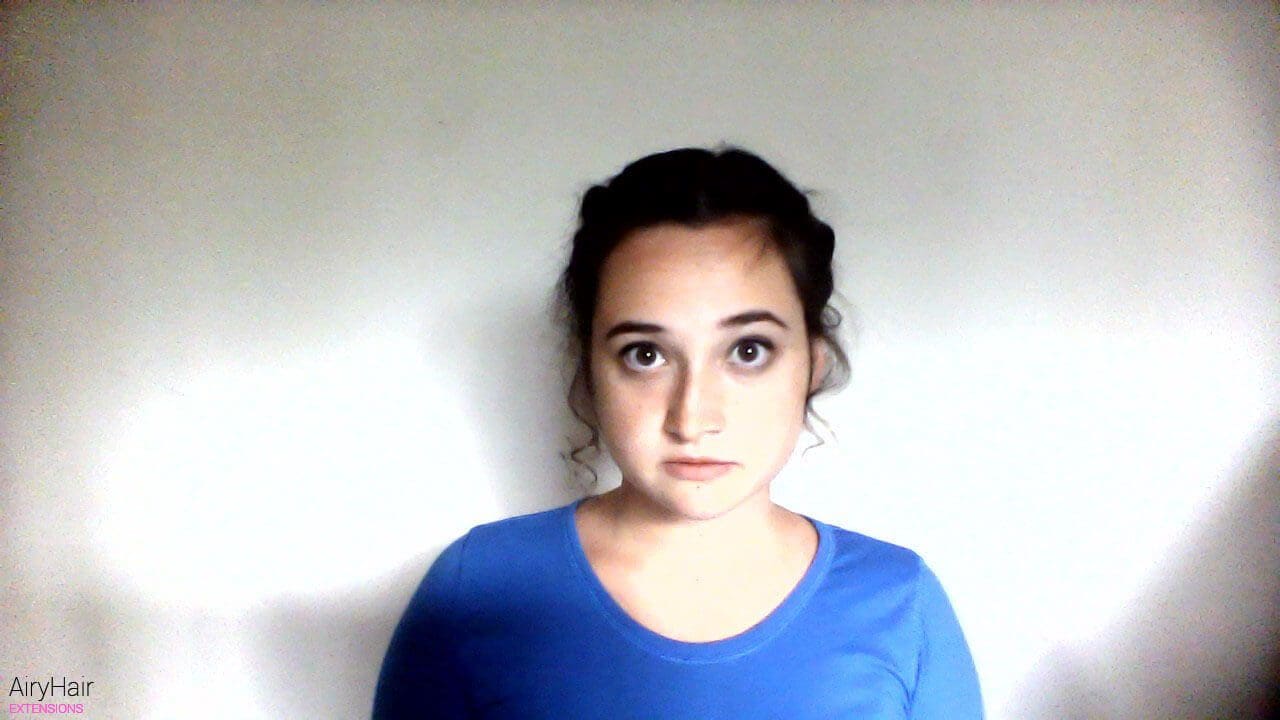
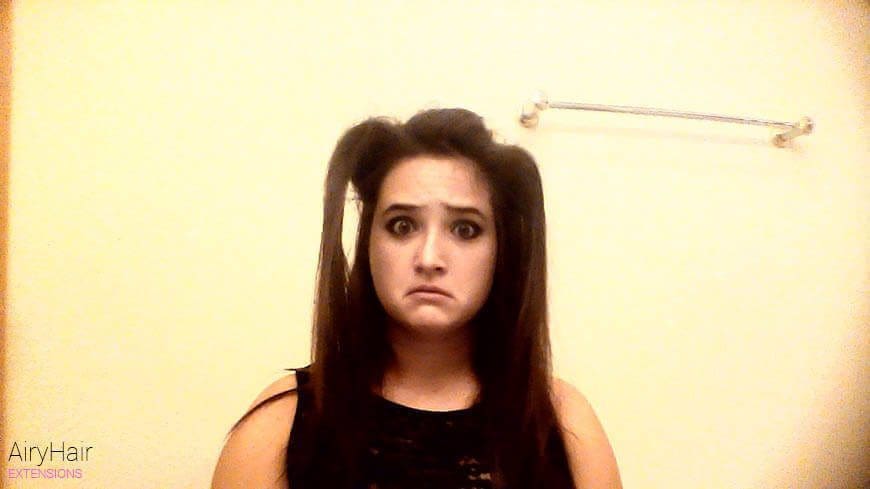
End Result
Congratulations! You just completed the fastest, classiest, lazy-girl hairstyle.

This is not your ordinary ballerina bun. The added braids helps give your hair volume and texture. The added couple of minutes it takes to complete this look is well worth the time! If your hair has multiple layers in it, I recommend using palm aid or hair glue to keep your braid in place.
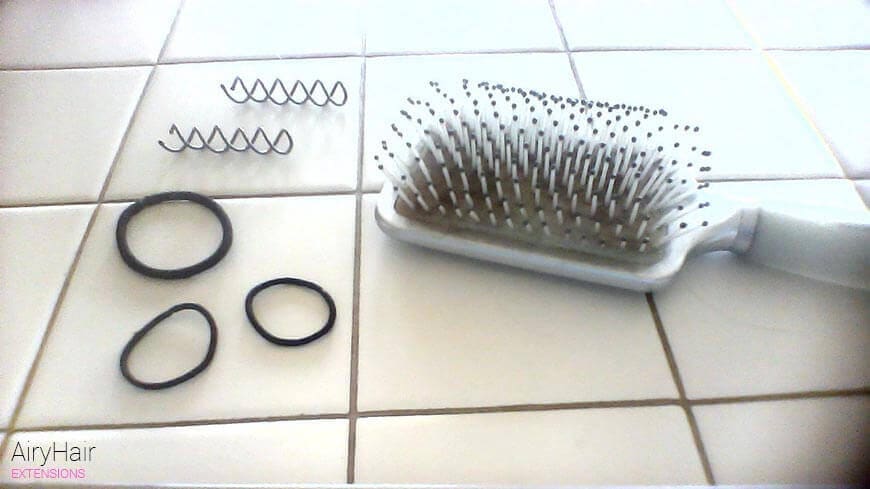
What You Will Need: Hairbrush, 2 Spiral Spin Screw Pins, 2 Small Ties, and 1 Large Tie
How Long Will This Look Take: 3 to 5 Minutes
Skill Level: Beginner
Step One
Brush your hair!
Step Two
As always, part your hair far to the side.

Step Three
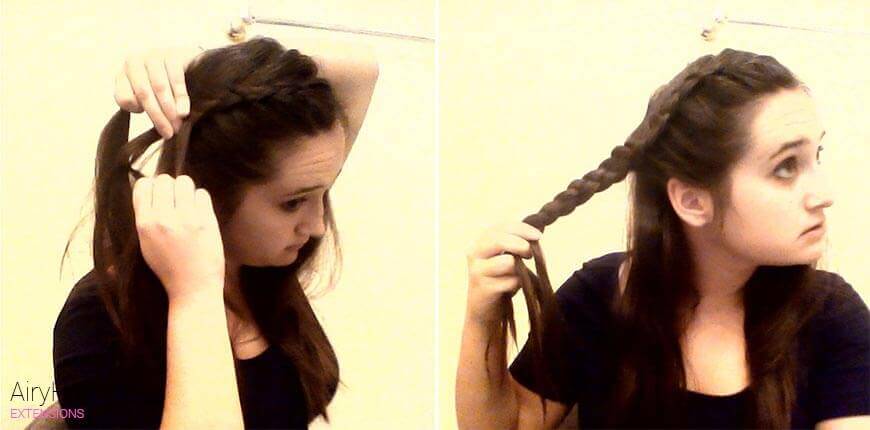
Start dutch braiding your hair from your part. Continue Dutch braiding until you hit behind your ear, then start braiding normally. When you hit the end of your hair, tie it off with a small hair tie.
Step Four
Gather all excess hair into a ponytail at the crown of your head and braid the ponytail. Your hair should be completely braided, and you should have two separate braids now.
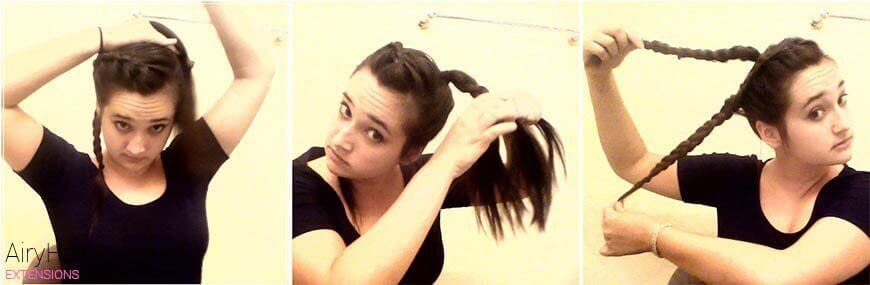
Step Five
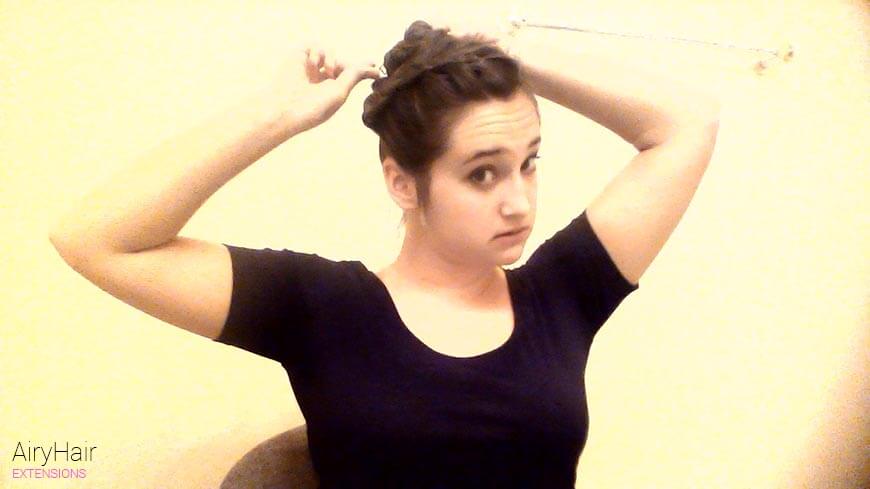
Twist your two braids into a bun.
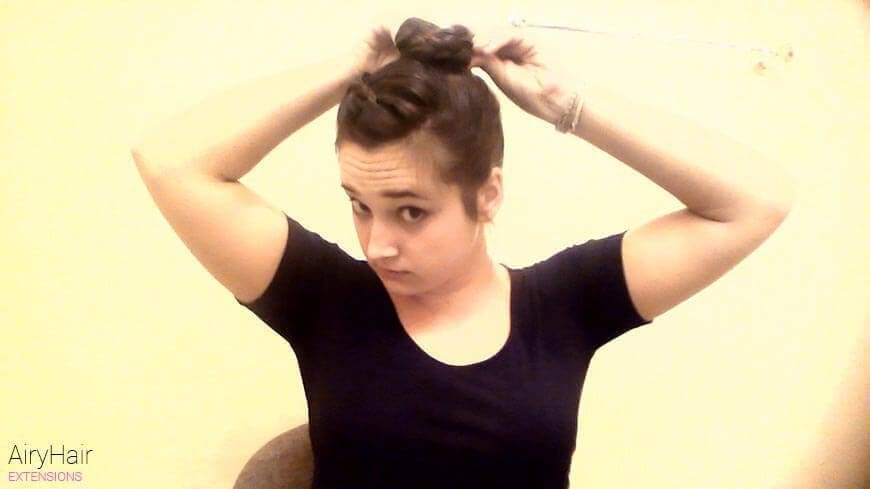
Step Six
Use your spiral spin screw pins to hold the bun in place.
Step Seven
Use your fingers to loosen the braids on your head by pulling on the outer parts.
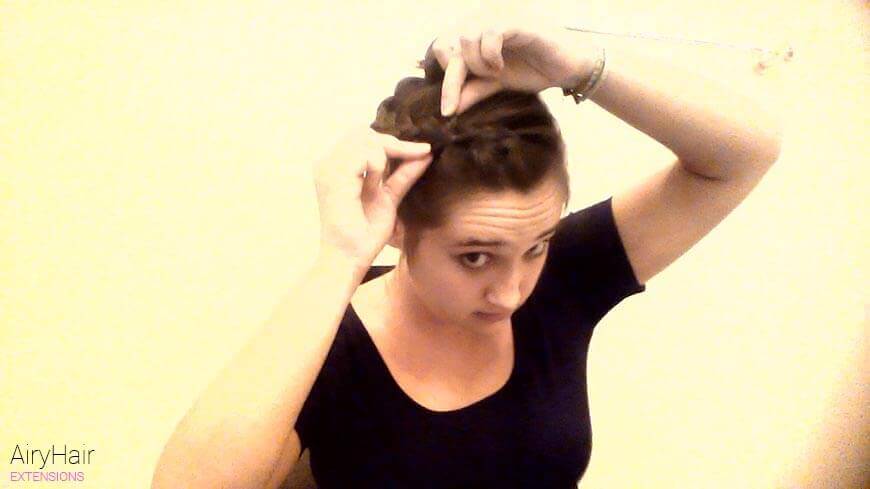
End Result
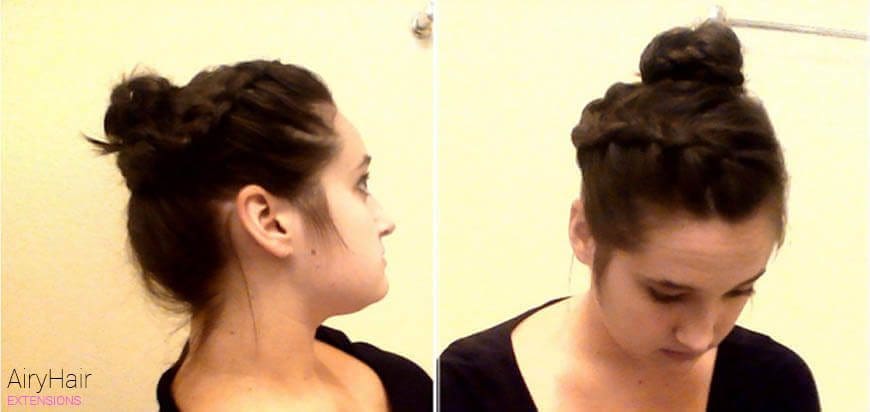
You are done!
There are only so many things you can do with your hair when you are growing out your bangs. There is a stage when your bangs hit an awkward length where you feel compelled to pull them back every day, and after two weeks of just headbands and braids, you get bored with your hair. Here is a new way to pin back those pesky bangs when they grow out.
What You Will Need: A high quality hair brush and 2 Bobby Pins

How Long Will This Look Take: 3 Minutes
Skill Level: Intermediate
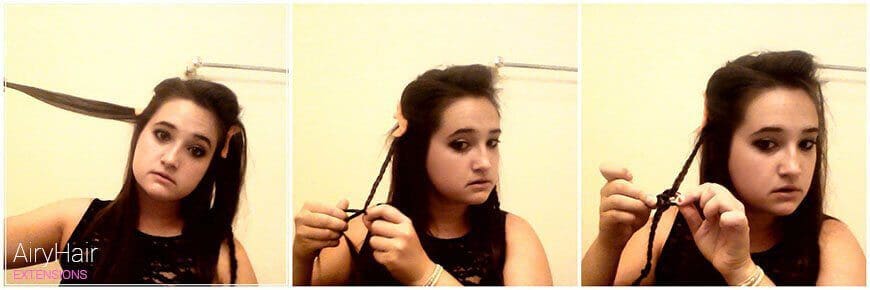
Step One
Like I always say, brush your hair!

Step Two
Part your hair far to the side.

Step Three
At the beginning of your part, grab two small size pieces of hair.

Step Four
With the two strands, tie your hair in a single knot. To tie a knot, all you have to do is place one piece over the other and then pull the strand you pulled over through the loop.

Step Five
Pull on the strands until the knot is on your roots.

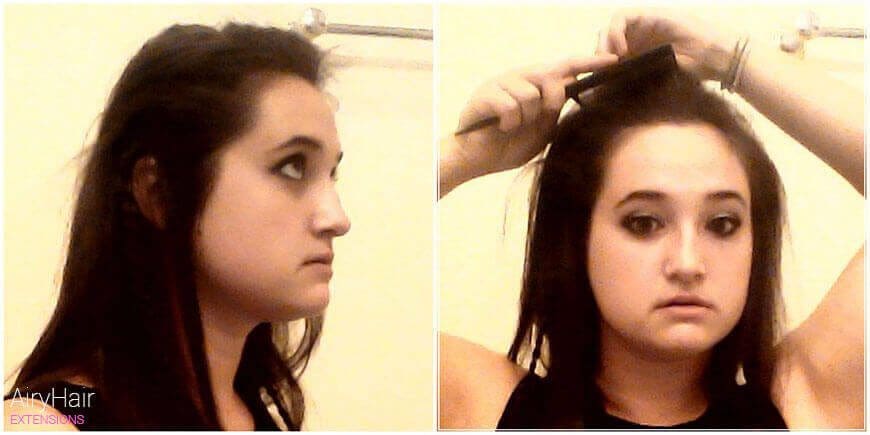
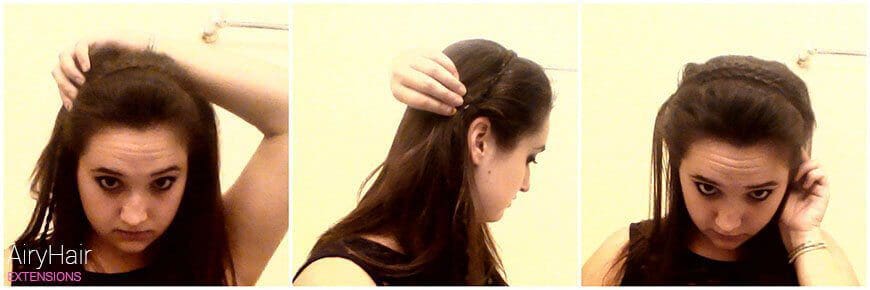
Step Six
Bring in more hair and repeat steps 4-5 until you have three to four loops.

Step Seven
Take your two bobby pins and pin the chain braid in place.

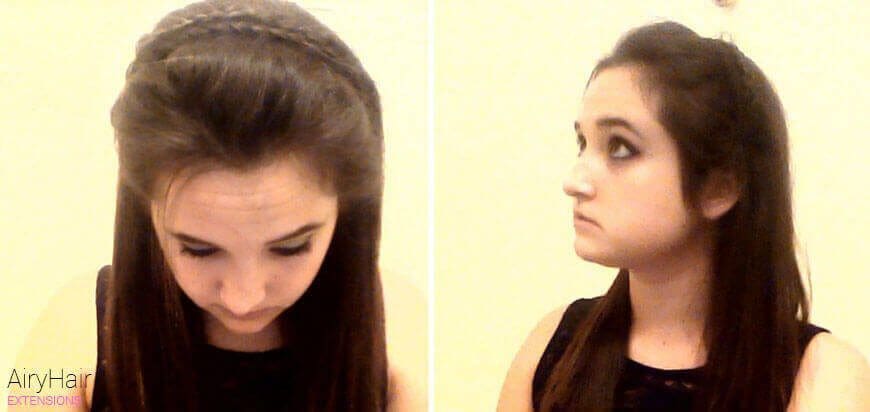
End Result
All finished! I hope you found your new favorite ways to keep your bangs out of your face!

This peppy hairstyle is perfect for girly ladies who like their hair out of their face but still want to look feminine. Nothing says “girly-girl” like a hair bow! This stylish look is great for an active workout or everyday wear. If you want your hair completely off your back, instead of pulling only half of your hair up, put up the whole thing!
What You Will Need: 1 Large Hair Tie, 1 Small Hair Tie, Hairbrush, and 2 Bobby Pins

How Long Will This Look Take: 5 – 10 Minutes
Skill Level: Beginner
Step One
Brush your hair!

Step Two
Gather the hair from in front of your ears up to the crown on your head.

Step Three
Put your hair in a loop bun with a long piece of your ponytail sticking out towards your forehead. Be careful not to make your loop bun too big, or your bow will be floppy.

Step Four
Take the excess ponytail from the looped bun and braid it. Tie it off with a small hair tie.

Step Five
Separate your loop bun into two equal parts with your fingers.

Step Six
Flip your braid over the separation in your loop bun.

Step Seven
Pin the braid in place by putting the bobby pins through the hair ties of your braid. Pin it directly behind your bun.

Step Eight
Adjust your bow with your fingers by pulling on the outer loops.

End Result
Finished! I hope your bow looks amazing!

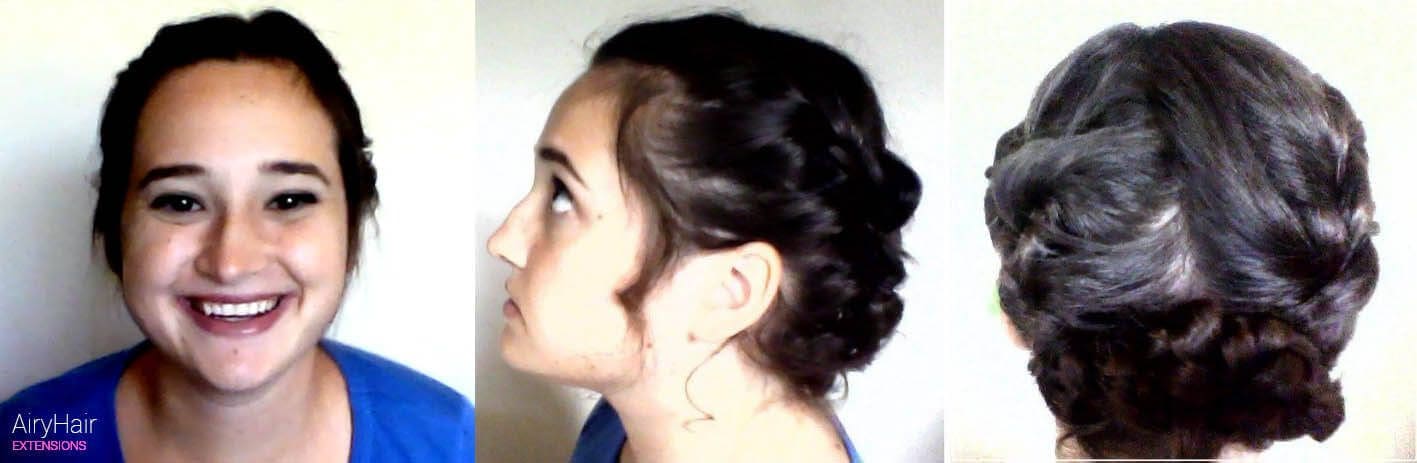
This classic style never goes out of fashion. This hairstyle just screams 50’s pin-up. This intermediate hairstyle takes a little more effort to achieve, but it is worth the time. You will get compliments on this stylish bun all day long!
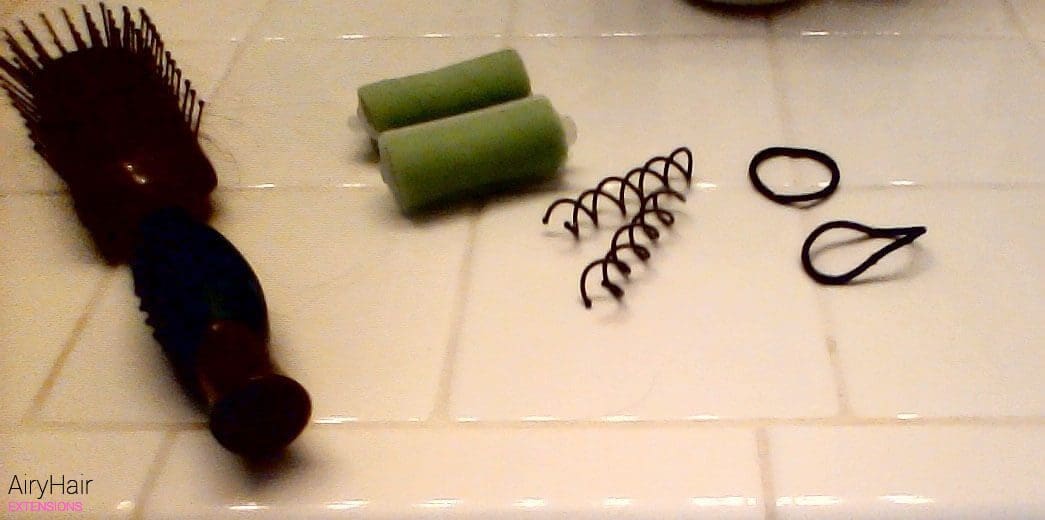
What You Will Need: Hairbrush, 3 Small Hair Ties, 1 Large Hair Tie, 2 Spiral Spin Screw Pins
How Long Will This Look Take: 7 Minutes
Skill Level: Intermediate
Video
Step One
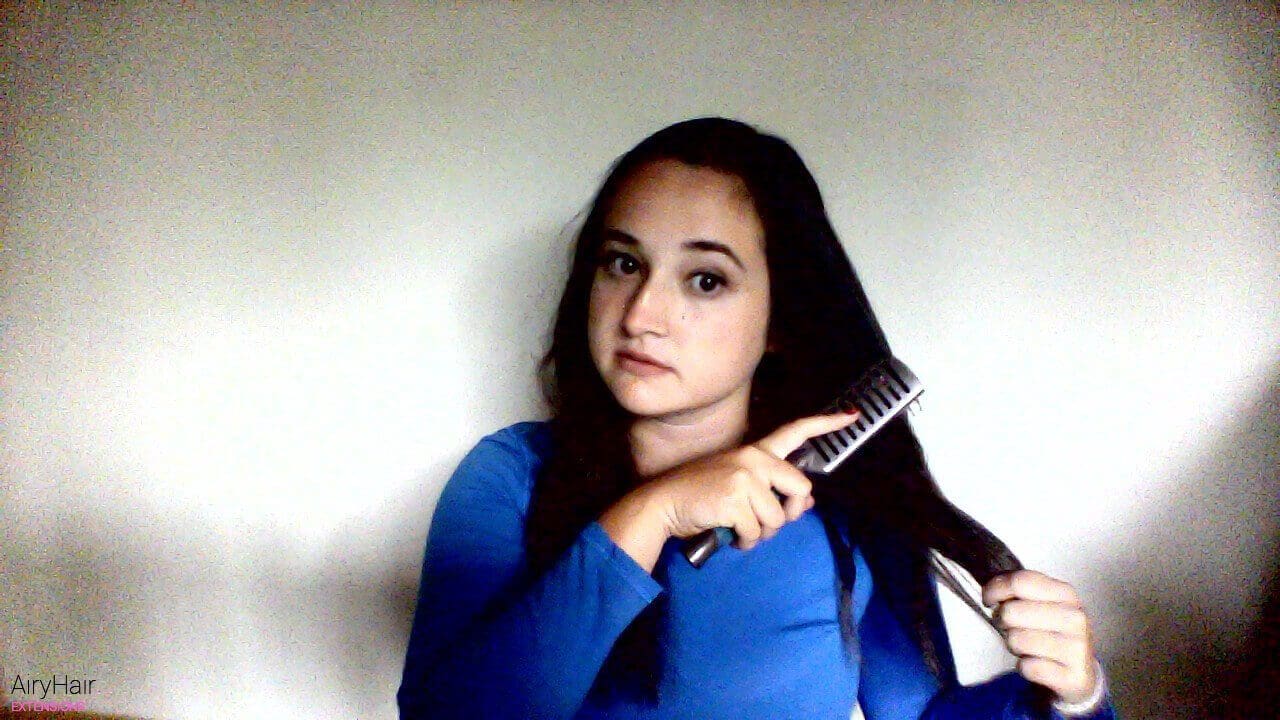
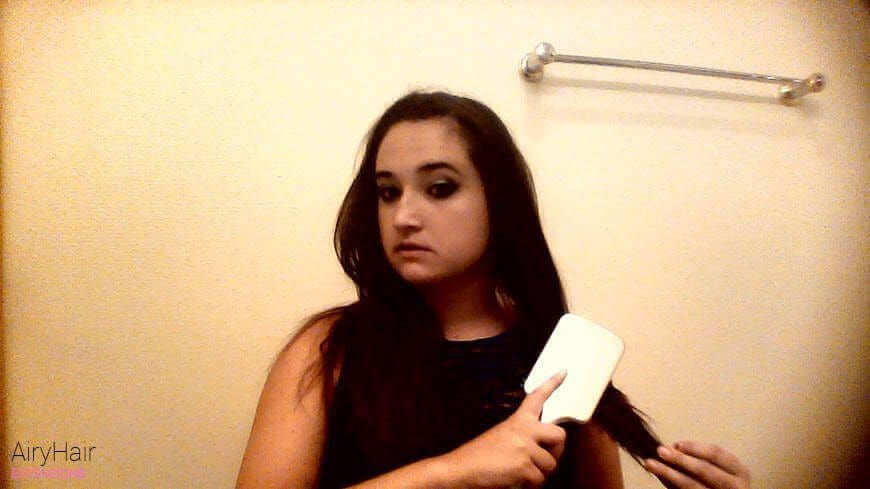
Like I start every “how-to” post, brush your hair.
Step Two
Part your hair far to the side.
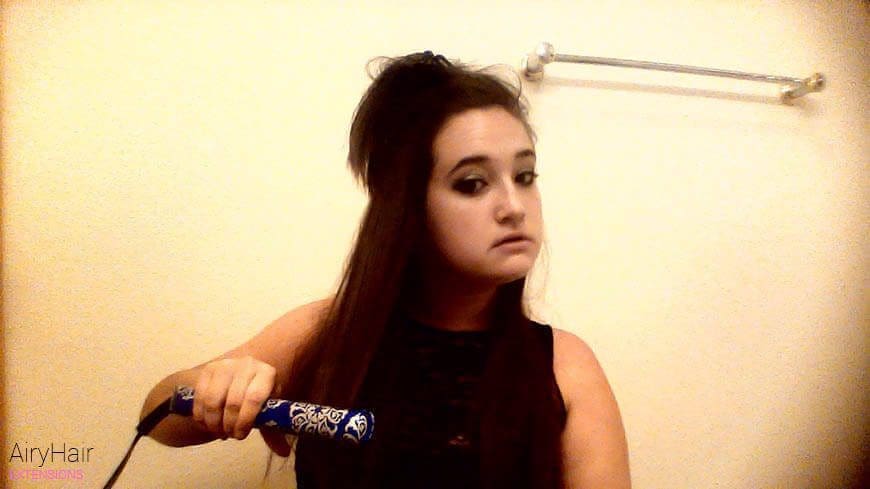
Step Three
Starting at your part, start twisting your hair toward the back. Move down your hairline doing this motion, bringing more hair in every time you twist.
Step Four
Continue twisting your hair to your head until you hit the behind your ear. Then continue with the strand already twisted down to your roots and tie it off with a small hair tie.
Step Five
Do the same thing on the other side of your head. You should have a small amount of hair on the back of your head. Pull this hair into a ponytail, then twist it the section as well, tying it off with a small hair tie.
Step Six
Take all three twisted ponytails and twist them again into a bun around the ponytail in the back.
Step Seven
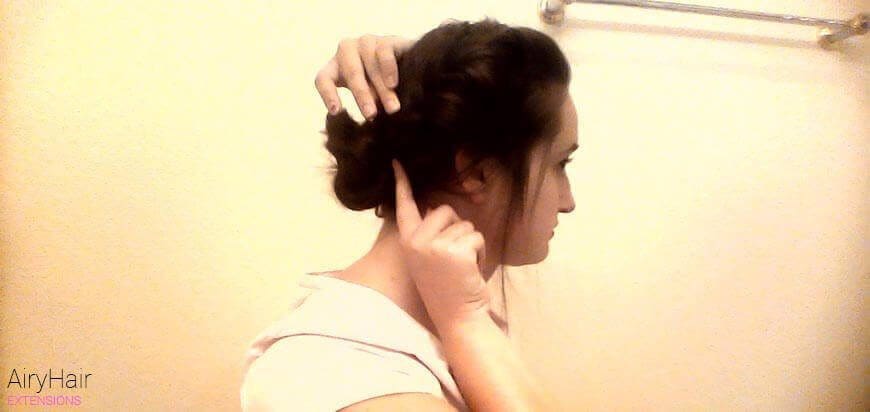
With one hand, hold the twisted bun in place. With the other, but the spiral spin screw pins at the top and bottom of the bun.
Step Eight
Take a bobby pin and put it on the edges of the bun, securing the twists in place.
End Result
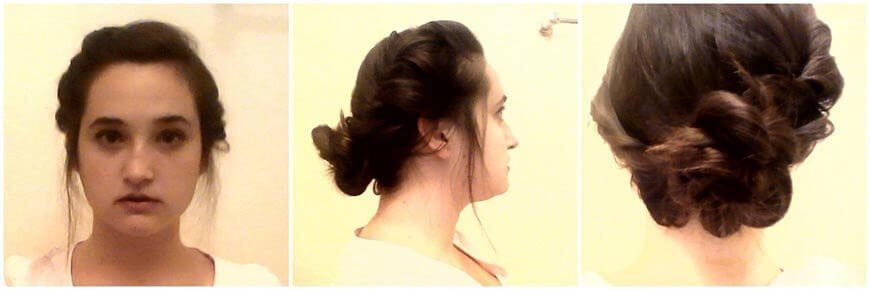
Ta-da! You are done!
This boho hairstyle looks like it would be hard to complete, but in reality, all you need to know how to do is a French braid.
This style is one of my preferred hair looks for myself because it keeps my hair away from my face and looks more elegant than a bun. This hairdo is like a little black dress, perfect for everyday wear and more formal occasions.
What You Will Need
Hairbrush, 2 Small Hair Ties, 2 ½ Inch Rollers, 2 Spiral Spin Screw Pins
How Long Will This Look Take: 8 to 10 Minutes
Video
Step One
Brush your hair!
Step Two
Part your hair in the middle.
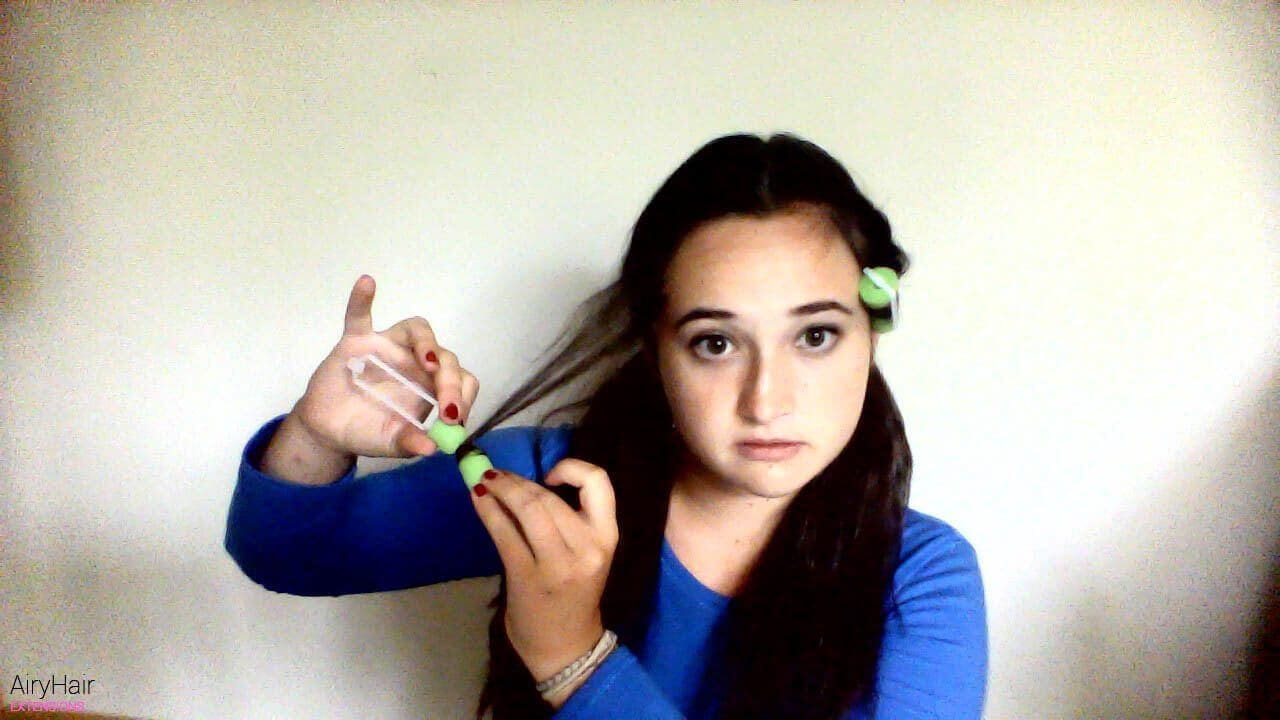
Step Three
With your two hair ties, create two pigtails below your ears. Then drag your fingers through your hair by your temples, pulling down some stray pieces. With your rollers, curl up those stray pieces, rolling inward toward your temple.
Step Four
Take a single pigtail and then, starting at your forehead French, braid the loose hair. Go all the way down your hair until you run out; it is okay if your layers stick out of the braid because this look is meant to look a bit messy. When you complete French braiding on that side, do the same with the other.
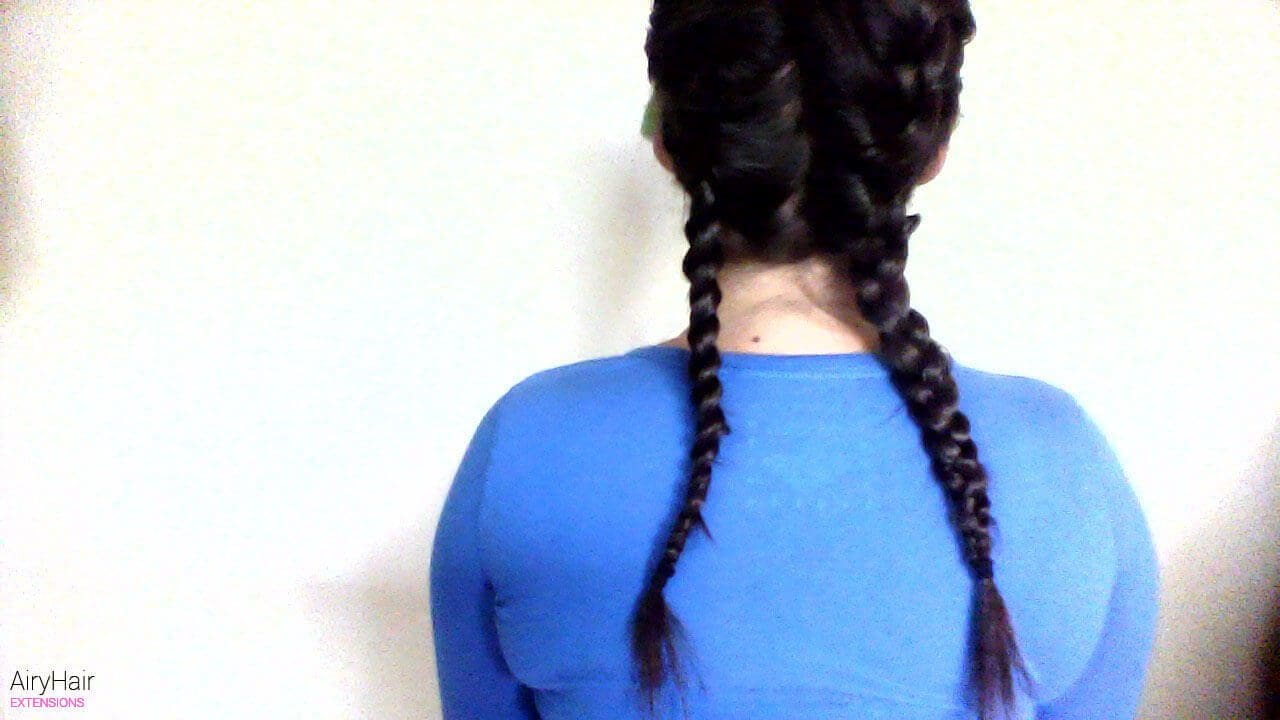
Step Five
Take your braids and then tie them in a knot at the nape of your neck.
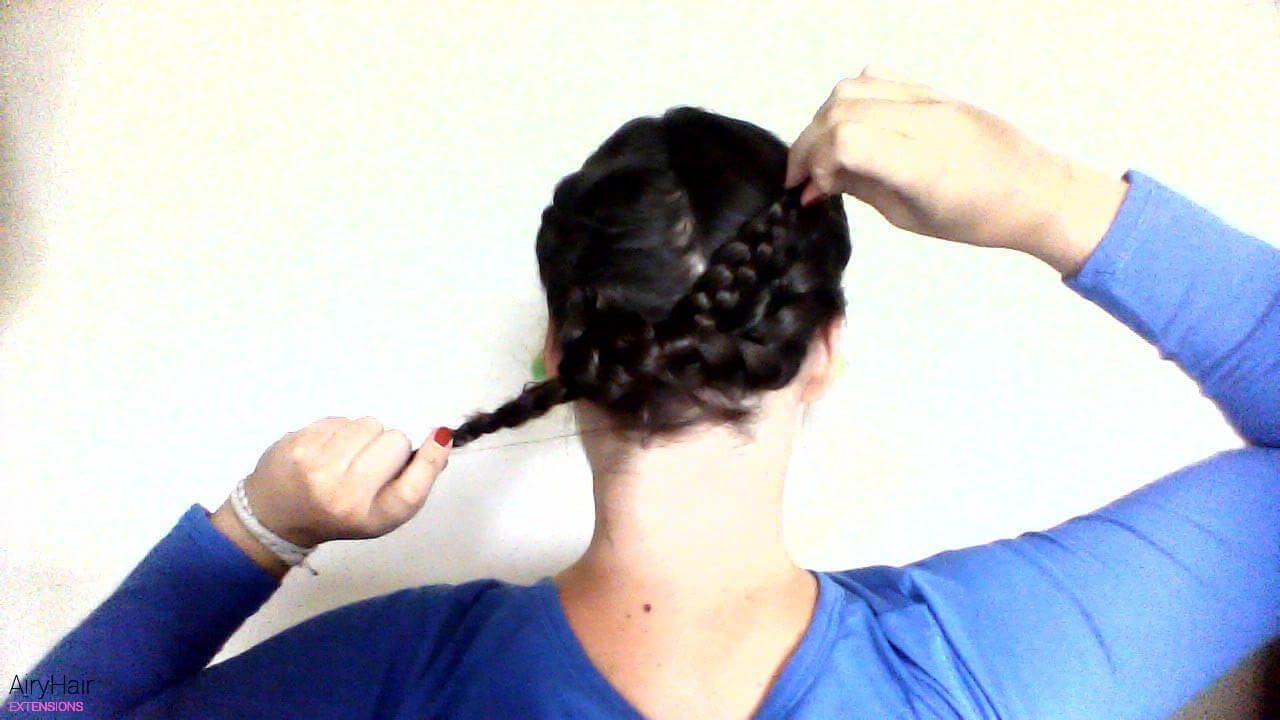
Step Six
Tuck the end of your braids into the knot, hiding the ends that are not braided.
Step Seven
Using one hand, hold the knot in place. On the other hand, get one spiral spin screw pin and twist it in by the bottom of your scalp going inward. Do the same to the other side but in the opposite direction.
Step Eight
At this point, do your makeup or go get breakfast with the rollers still in your hair. Right before you leave your house, take out the two rollers and brush the curls out a bit.
Step Nine
Tuck back the excess curls into the twist. There should only be a few curled wisps to frame your face, not whole long strands.
Final Result
See, it wasn’t that hard! You have completed the look! The boho braid twist result should look like this!
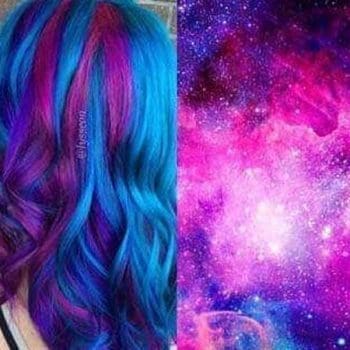
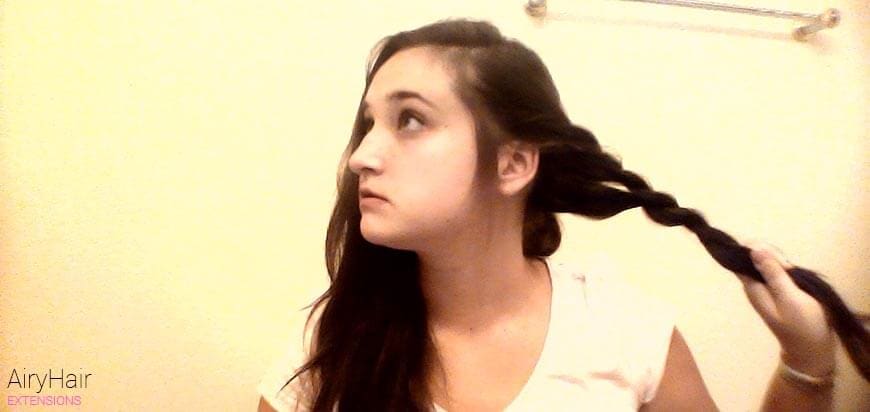
Hairdos featuring plaits in interwoven zigzag patterns have been popular for thousands of years in numerous cultures around the world. Today’s trendy hair braid styles combine new varieties with old traditions. If you wish your locks were long enough for the latest sensations, why wait for them to grow? Just use extensions instead for interlaced creations that allow styling versatility. We’ve paired all-natural AiryHair by attachment types with easy directions for a fishtail braid, rope twist, and upswept head crown.
Micro loop bundles add length for various hair braid styles. To create a side-swept fishtail that swings over one front shoulder, you can insert more extensions on just the decorative side. Part a thin vertical rooted section. Draw natural strands and AiryHair through tiny beads almost to your scalp. Crimp the mini rings firmly with special pliers to secure.
Step One
To make a fishtail, brush your hair’s length over your right or left shoulder. Divide it into two even halves. Separate a slender under-strip of hair (section A) from the farthest side closest to your neck. Bring it up and around, adding those inner strands to the other thick chunk (section B).
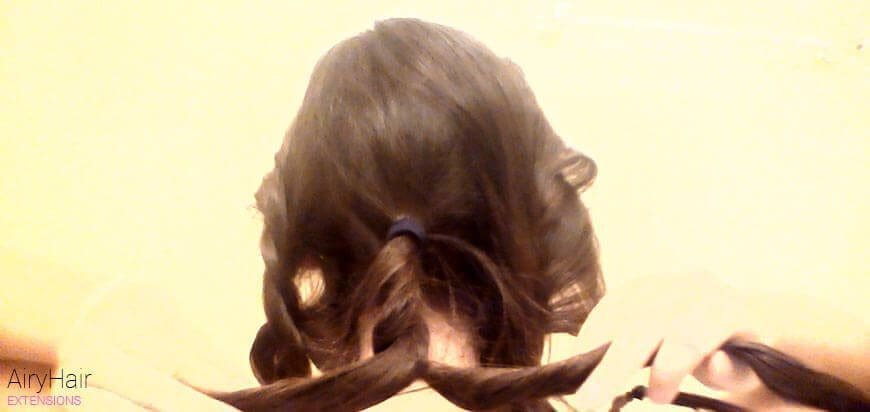
Step Two
Smooth them together. Going the opposite direction, repeat that process with your hairline locks. Cross the outermost narrow B segment by your face above the A half. Blend in to expand that portion.
Step Three
Keep duplicating those steps. Overlap the outermost Section A strip to join B. Lift B’s farthest strands over to mingle with Section A. As you continue from the outside in, a herringbone arrangement will emerge. Secure your braid’s ends with an invisible elastic band or colorful ribbon. Pinch outer edges to pancake or thicken them, even lopsided plaits, or create a messy casual look.
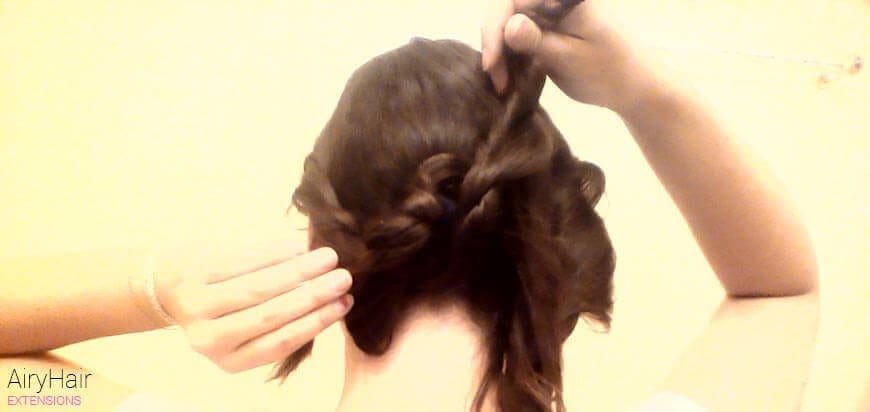
 Try clip-in AiryHair extensions for quick extra length to design rope twist hair. Fasten wider extensions’ teeth below your parting line, starting near one ear and working your way across to the other. Fill in thin back and side areas with narrow strips to boost the overall body.
Step One
Weaving your locks from one side in front of your shoulder creates a wrap-around effect that hangs down your back. Twist a hair section by your face. Do the same to another right behind it, lifting the second one above and around the first. For a coiled rope look, add extra strands to the current bottom portion, similar to French braiding.
Step Two
Drape it over your top piece. Continue that process until reaching your neckline.
Split your remaining tresses into two parts. Twist each clockwise. Wrap them around each other, using a counterclockwise direction to prevent unraveling.
Step Three
Bind the ends with an elastic band. Enjoy this elegant, polished appearance. Or, for a windswept look, loosen the pattern with your fingers and brush it upward gently.
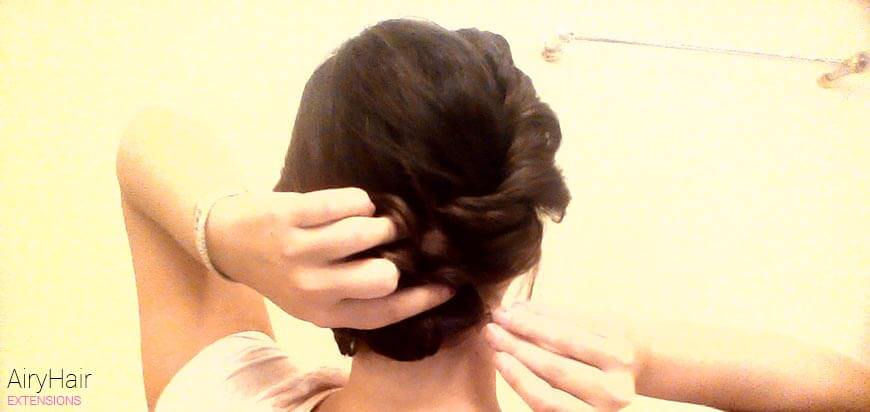
Glue in nail/u-tip strips to turn a braid hair extension look into a graceful upswept hairdo. A relative, friend, or stylist can use a hot fusion tool to attach these pre-bonded pieces. Separate a narrow-rooted portion for the first edition. The artificial keratin on the U-shaped tips melts easily.
Step One
Apply bonding agent to natural strands and secure each segment over the warm adhesive.
Step Two
Follow the previous instructions to create fishtail braid or rope twist hair braid styles. Then drape it around your head above your forehead to form an entwined crown.
Step Three
Tuck the loose ends under unplaited hair. Fasten it with hidden bobby pins. For a softer look, free some tendrils surrounding your face. Once just for classic milkmaids, this updo looks beautiful at weddings and other formal events.
This hairstyle is perfect for your night out! Its volumized look will make everyone turn their heads in awe. To complete this look, your hair does need to be a longer length, but don’t fret! If that’s the case, just follow steps 1-7 and put a normal headband in. That way, you’ll get the volumized headband look without the braid.
Let’s get going.
What You Will Need
Straightener, Hairspray, Hairbrush, Comb, 4 Bobby Pins, 2 Small Hair Ties, and 2 Duckbill Clips
Mine’s a bit orange, like the tasty fruit, so you can see them better in my hair.
How Long Will This Look Take
It’s not that time-consuming! Around 25 minutes (depending on how long it takes to straighten your hair)
Skill Level: Intermediate
Step One
Brush your hair!
Step Two
Divide your hair into layers and straighten each layer.
Step Three
Once your hair is completely straightened, gather the hair above your forehead. Hairspray the roots of that section and then tease the hair-sprayed part.
Step Four
Toss the newly teased section aside, and then do the same to the hair directly behind the section you just teased.
Step Five
Toss that section aside, too, and do the same thing to the sides of your hair, the section between your temples and ears.
Step Six
Your hair should look huge, volumized, and slightly ridiculous, like the picture below.
Step Seven
With your comb, brush away the fly-aways on the side of your head. Then with your clip (I used an orange bow clip so you can see it), clip in that section to the side of your head. Do this on both sides.
Step Eight
Grab a chunk of your hair behind your ear, then braid it, tying it off with a small hair tie. Using your fingers, pull on the braided parts to make the braid appear bigger. Do this to both sides of your head as well.
Step Nine
Take the clips out of the side of your hair and brush out the flyaways at the top of your head. Be careful not to comb out the teasing.
Step Ten
Take your braided strands and bobby pin them to behind the opposite ear that the headband started.
Wah-la! Your hair is done!
End Result
This look has been popular for as long as I can remember. Something about pinning up half of your head seems effortless and beautiful. Lately, people have been taking an extra step by shaving a side of their head to achieve this looks 24/7. I am a little wary of taking such a drastic step to get this look continuously, but if you want this look now and then, here is how to do it!
What You Will Need: Straightener, 2 Bobby Pins, Hairbrush, 1 Hair Tie, and Hairspray

How Long Will This Look Take: 25 minutes
Skill Level: Intermediate
Video
Step One
Brush your hair!

Step Two
Create the first layer of curls by grabbing a good chunk of hair and pulling it into a bun on the top of your head.

Step Three
Curl that layer with your straightener. To learn how to curl your hair with a straightener, please see my previous article.

Step Four
When finished curling that whole layer, spray only that layer with hairspray. Complete Steps 2 through 4 with at least two more layers, so your whole head is curled except the last top layer.

Step Five
Before curling your final layer, part your hair far to the side.

Step Six
Curl your final layer; with this layer, start the curl as close to the scalp as possible.

Step Seven
Your hair should be completely curled now and look somewhat like the picture below.

Step Eight
Only to the side of your head with less hair; brush out the front portion of your curls.

Step Nine
Gather the brushed-out curls and twist your hair close to your scalp. Stop twisting your hair when the twist is behind the ear.

Step Ten
Take your bobby pins and put one secure twist to your head. Putting one vertically and one horizontally works best with my hair type.

Step Eleven
Lightly brush out the end of your curls so your curls look less stringy and more natural.

End Result
You’re finished! I hope your hair looks fabulous!

Bonus: Have 1 Hour? Do a Butterfly Braid
It’s time for another DIY tutorial before the Halloween.
Today, we are going to show you the awesome and inspiring butterfly braid hairstyle that was sent to us by one of our fans. What! Thank you, Jessica!
What You Will Need
Not much, really! Hair clips, elastics and comb
How Long Will This Look Take: 1 hour
Skill Level: Advanced
Step by Step Tutorial

Video Tutorial
With before and after pictures and more.
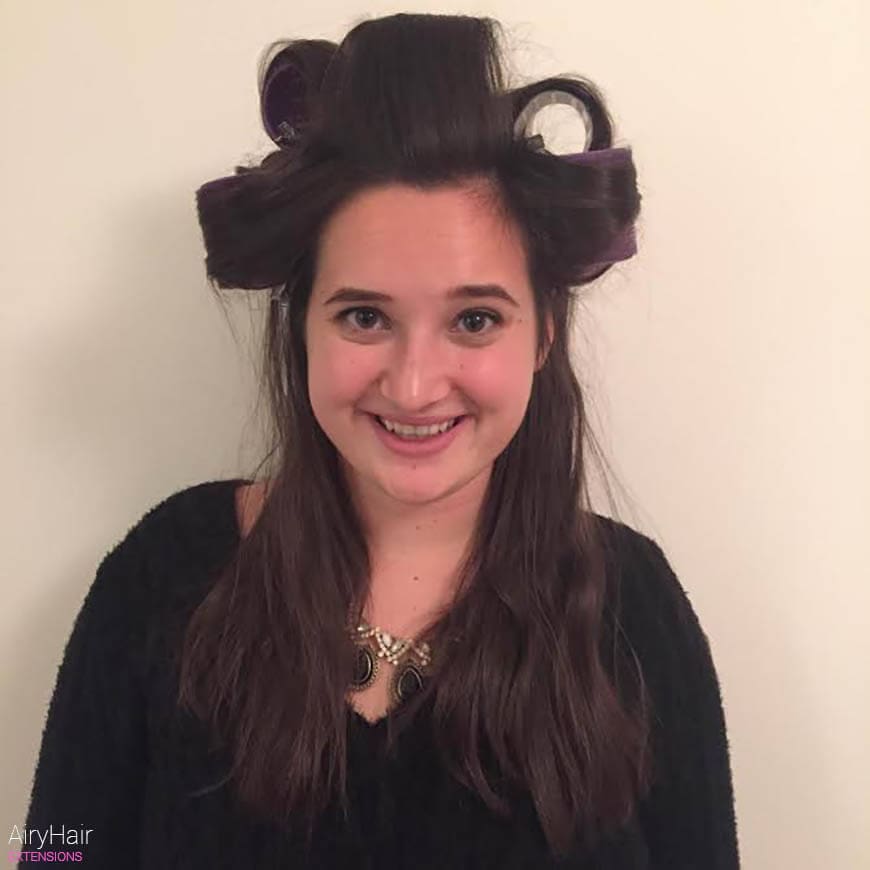
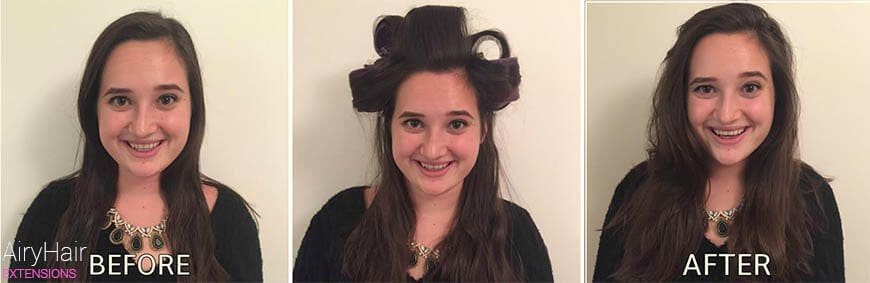
Probably the biggest kept beauty secret of this century: hair rollers. If you aren’t completely on this bandwagon, then you are mistaken. I know you probably think that you look like a grandmother, but you seriously shouldn’t overlook these miracle workers. It gives you the effect of a blowout without the actual blowout. Lucky for you, I am about to give you a step-by-step on how to properly use these things to give your hair optimal volume without any heat volume.
How Long Will This Look Take: 1-3 Hours
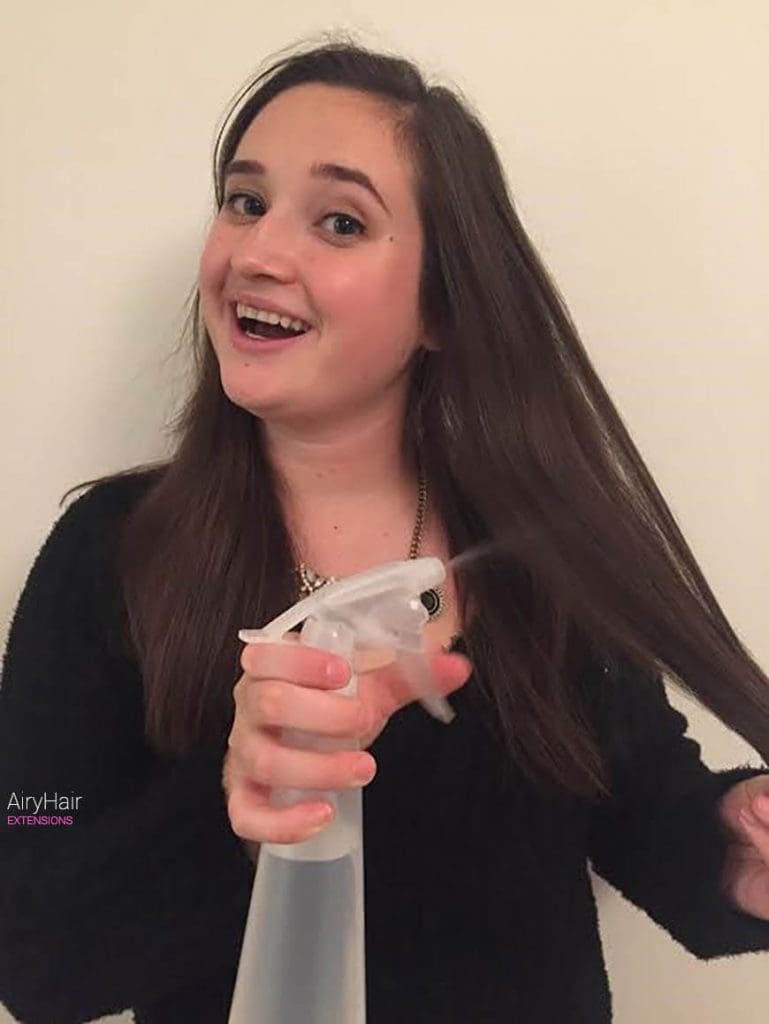
What You Will Need: Spray Bottle, Hairbrush, 1 ½ inch hair rollers with duckbill clips, optional: hairspray
Skill Level: Easy
Step One
Brush your hair!
Step Two
Spray your hair with water until it is lightly damp.
Step Three
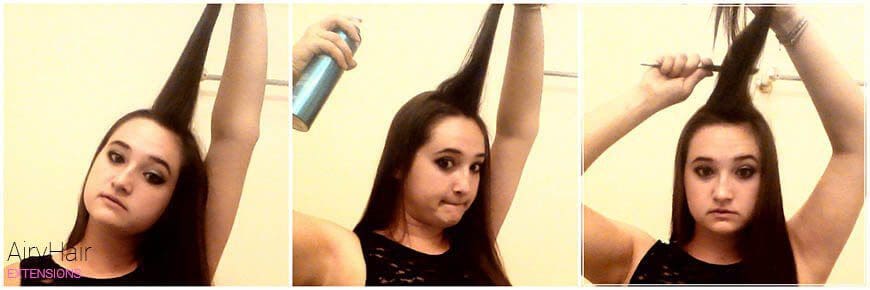
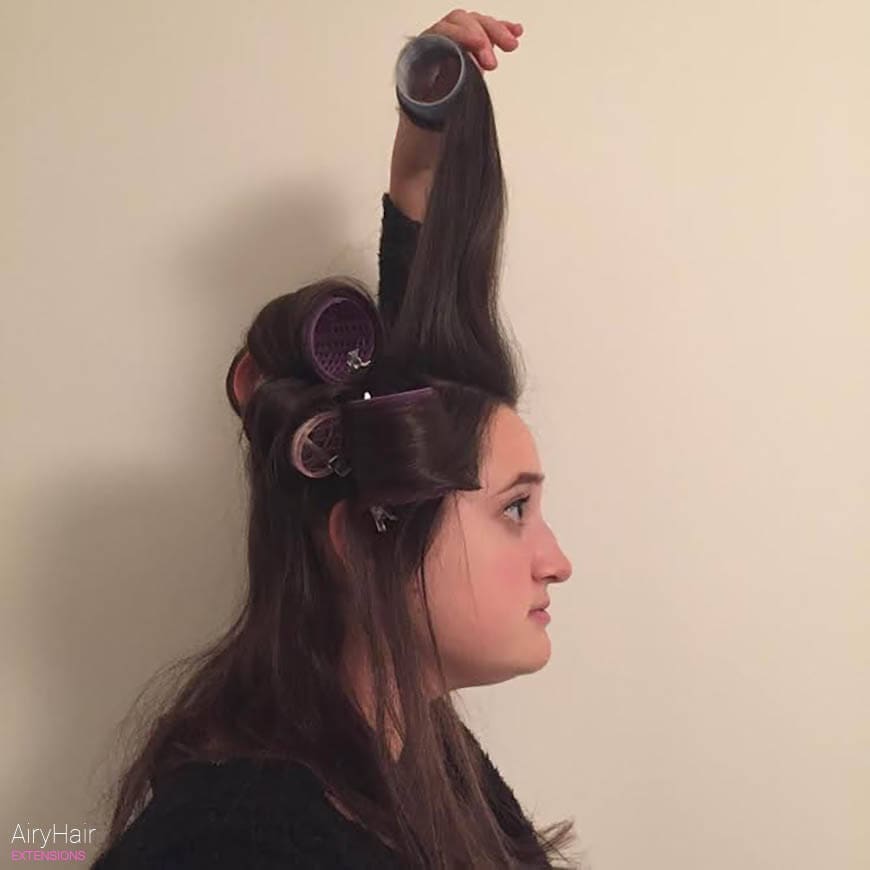
Grabbing a chunk of hair, stick your hair straight up. Tuck the first roller behind it.
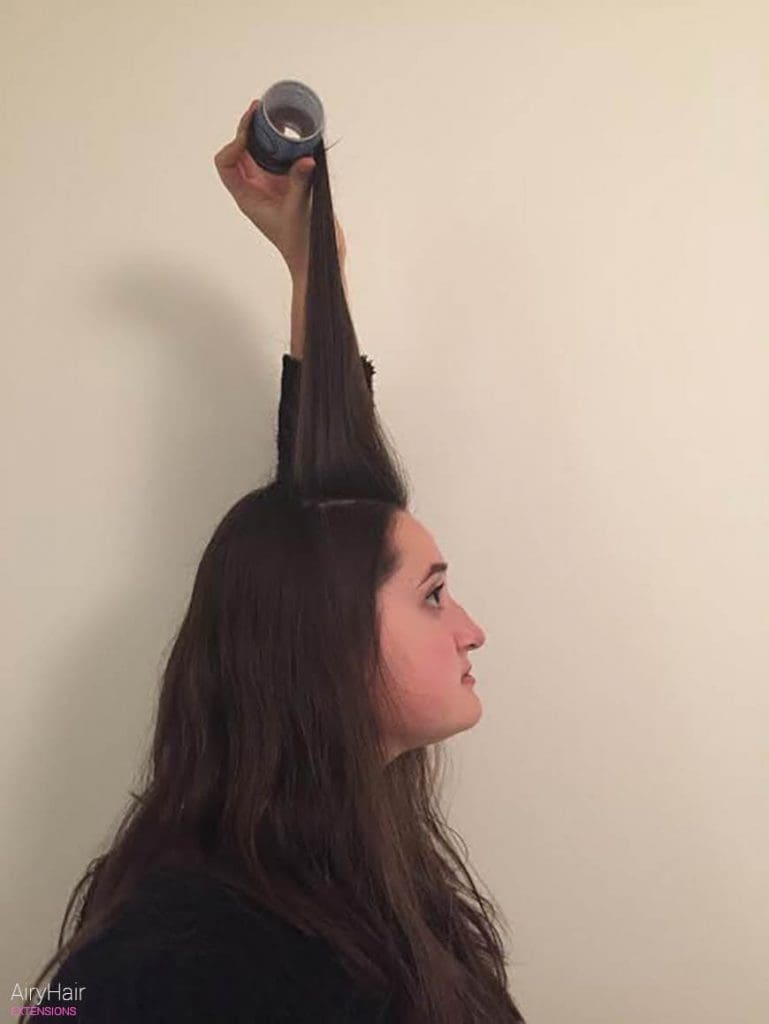
Step Four
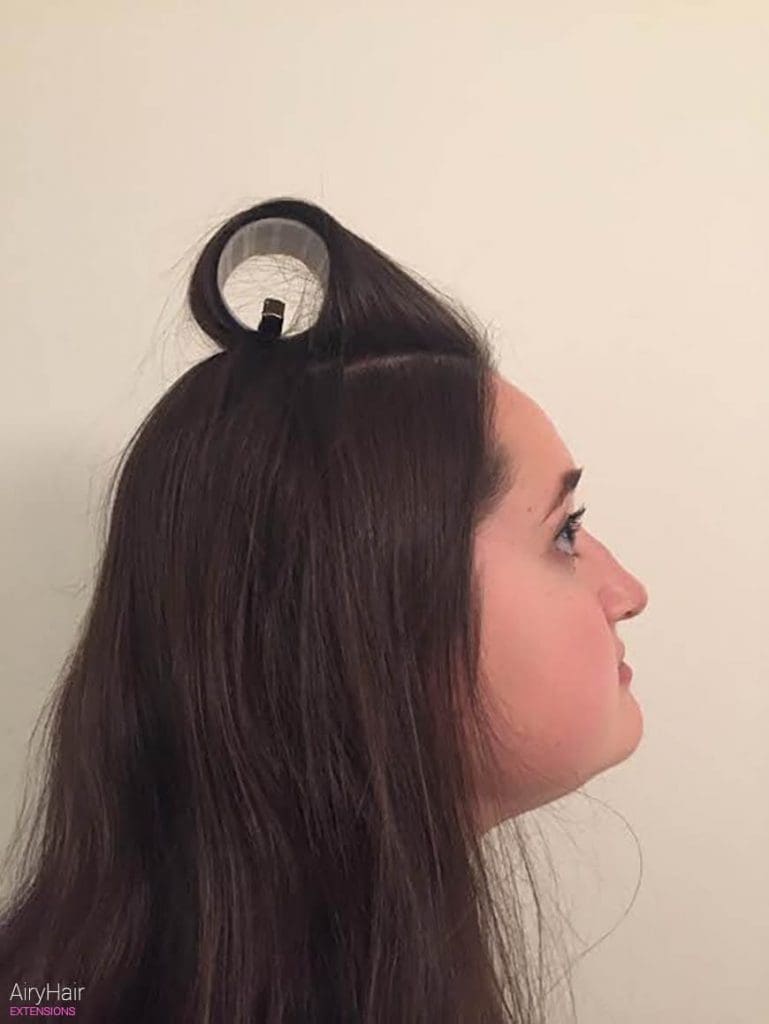
Start rolling your hair down the roller. Once you reach your roots, clip a duckbill clip to the root and roller.
Step Five
Do this all over your head with rollers. Wait anywhere from 1 hour to 3 hours to take out your rollers. The longer you keep them in, the better!
Step Six
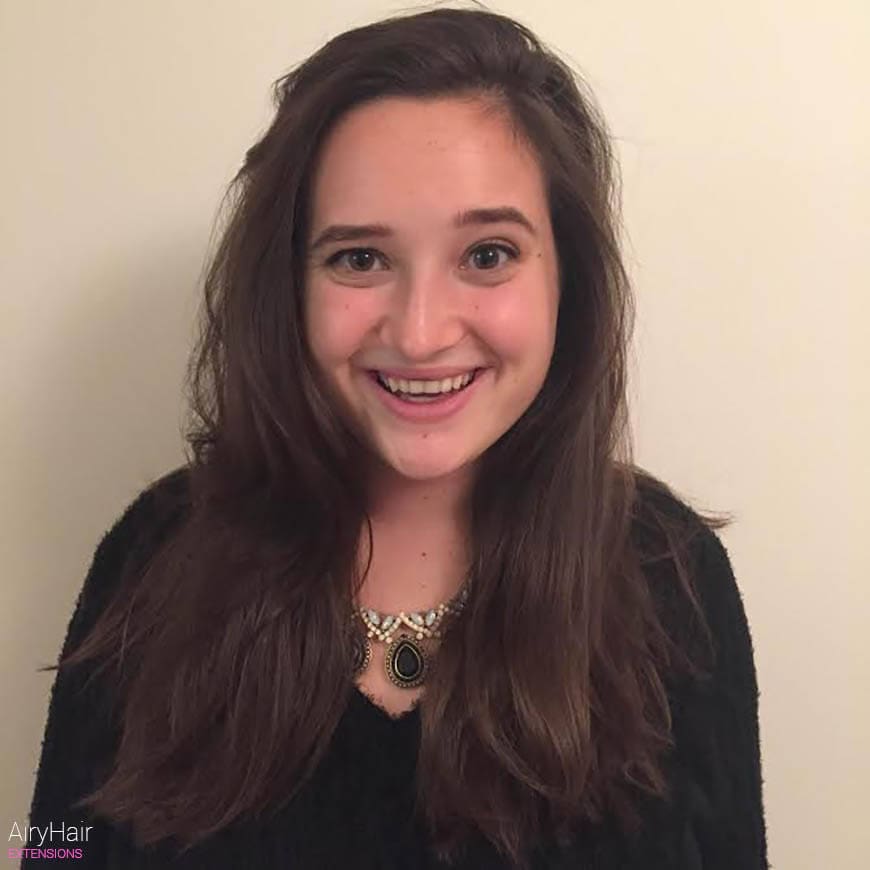
Take your rollers out the same way you put them in; by rolling them. Yanking will only make your hair frizzy.
Step Seven
Look fabulous with your freshly rolled hair!
Did you enjoy this tutorial?
Can’t find a good quality roller? Visit us at AiryHair and get one for a rather low price.
P.S. You know what else can you add to the set? Remy extensions.
Author: Sophia Strojny.